
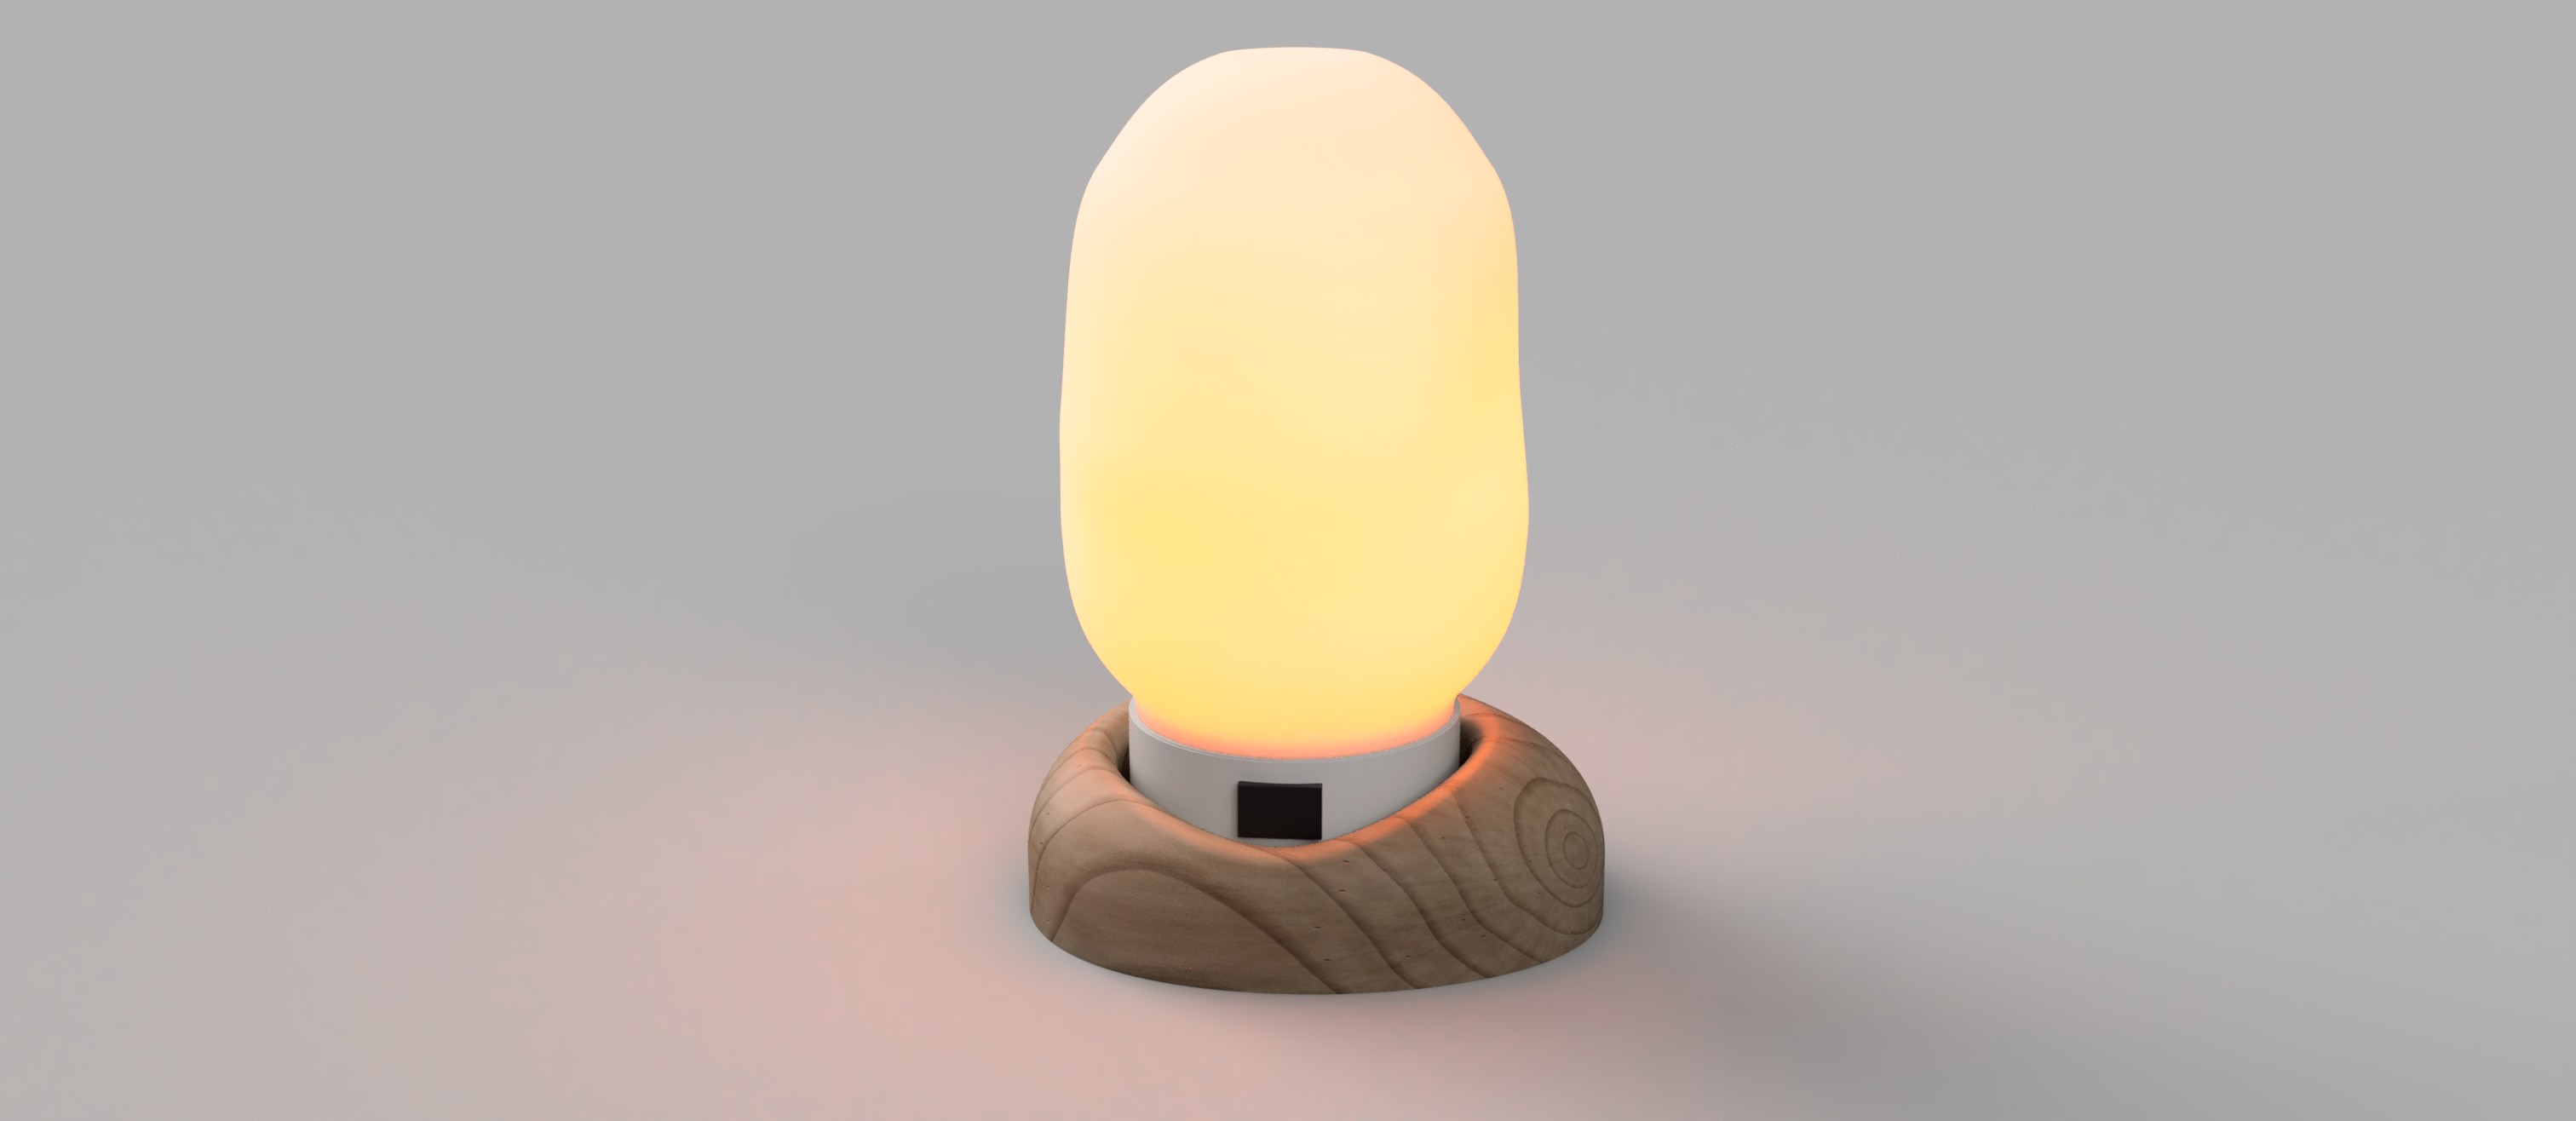
Light Mode
An interactive lamp that detects different stands and responds with colour and motion.
ROLE
Solo creative technologist
WHEN
09.2025 - 10.2025
METHODS + TOOLS
Electronics/hardware
•
ESP32
•
3D printing
•
Fusion360
•
Laser cutting
•
Metal shop
•
Wood Shop
•
CNC machining + toolpathing
Overview
Each stand elicits different lighting
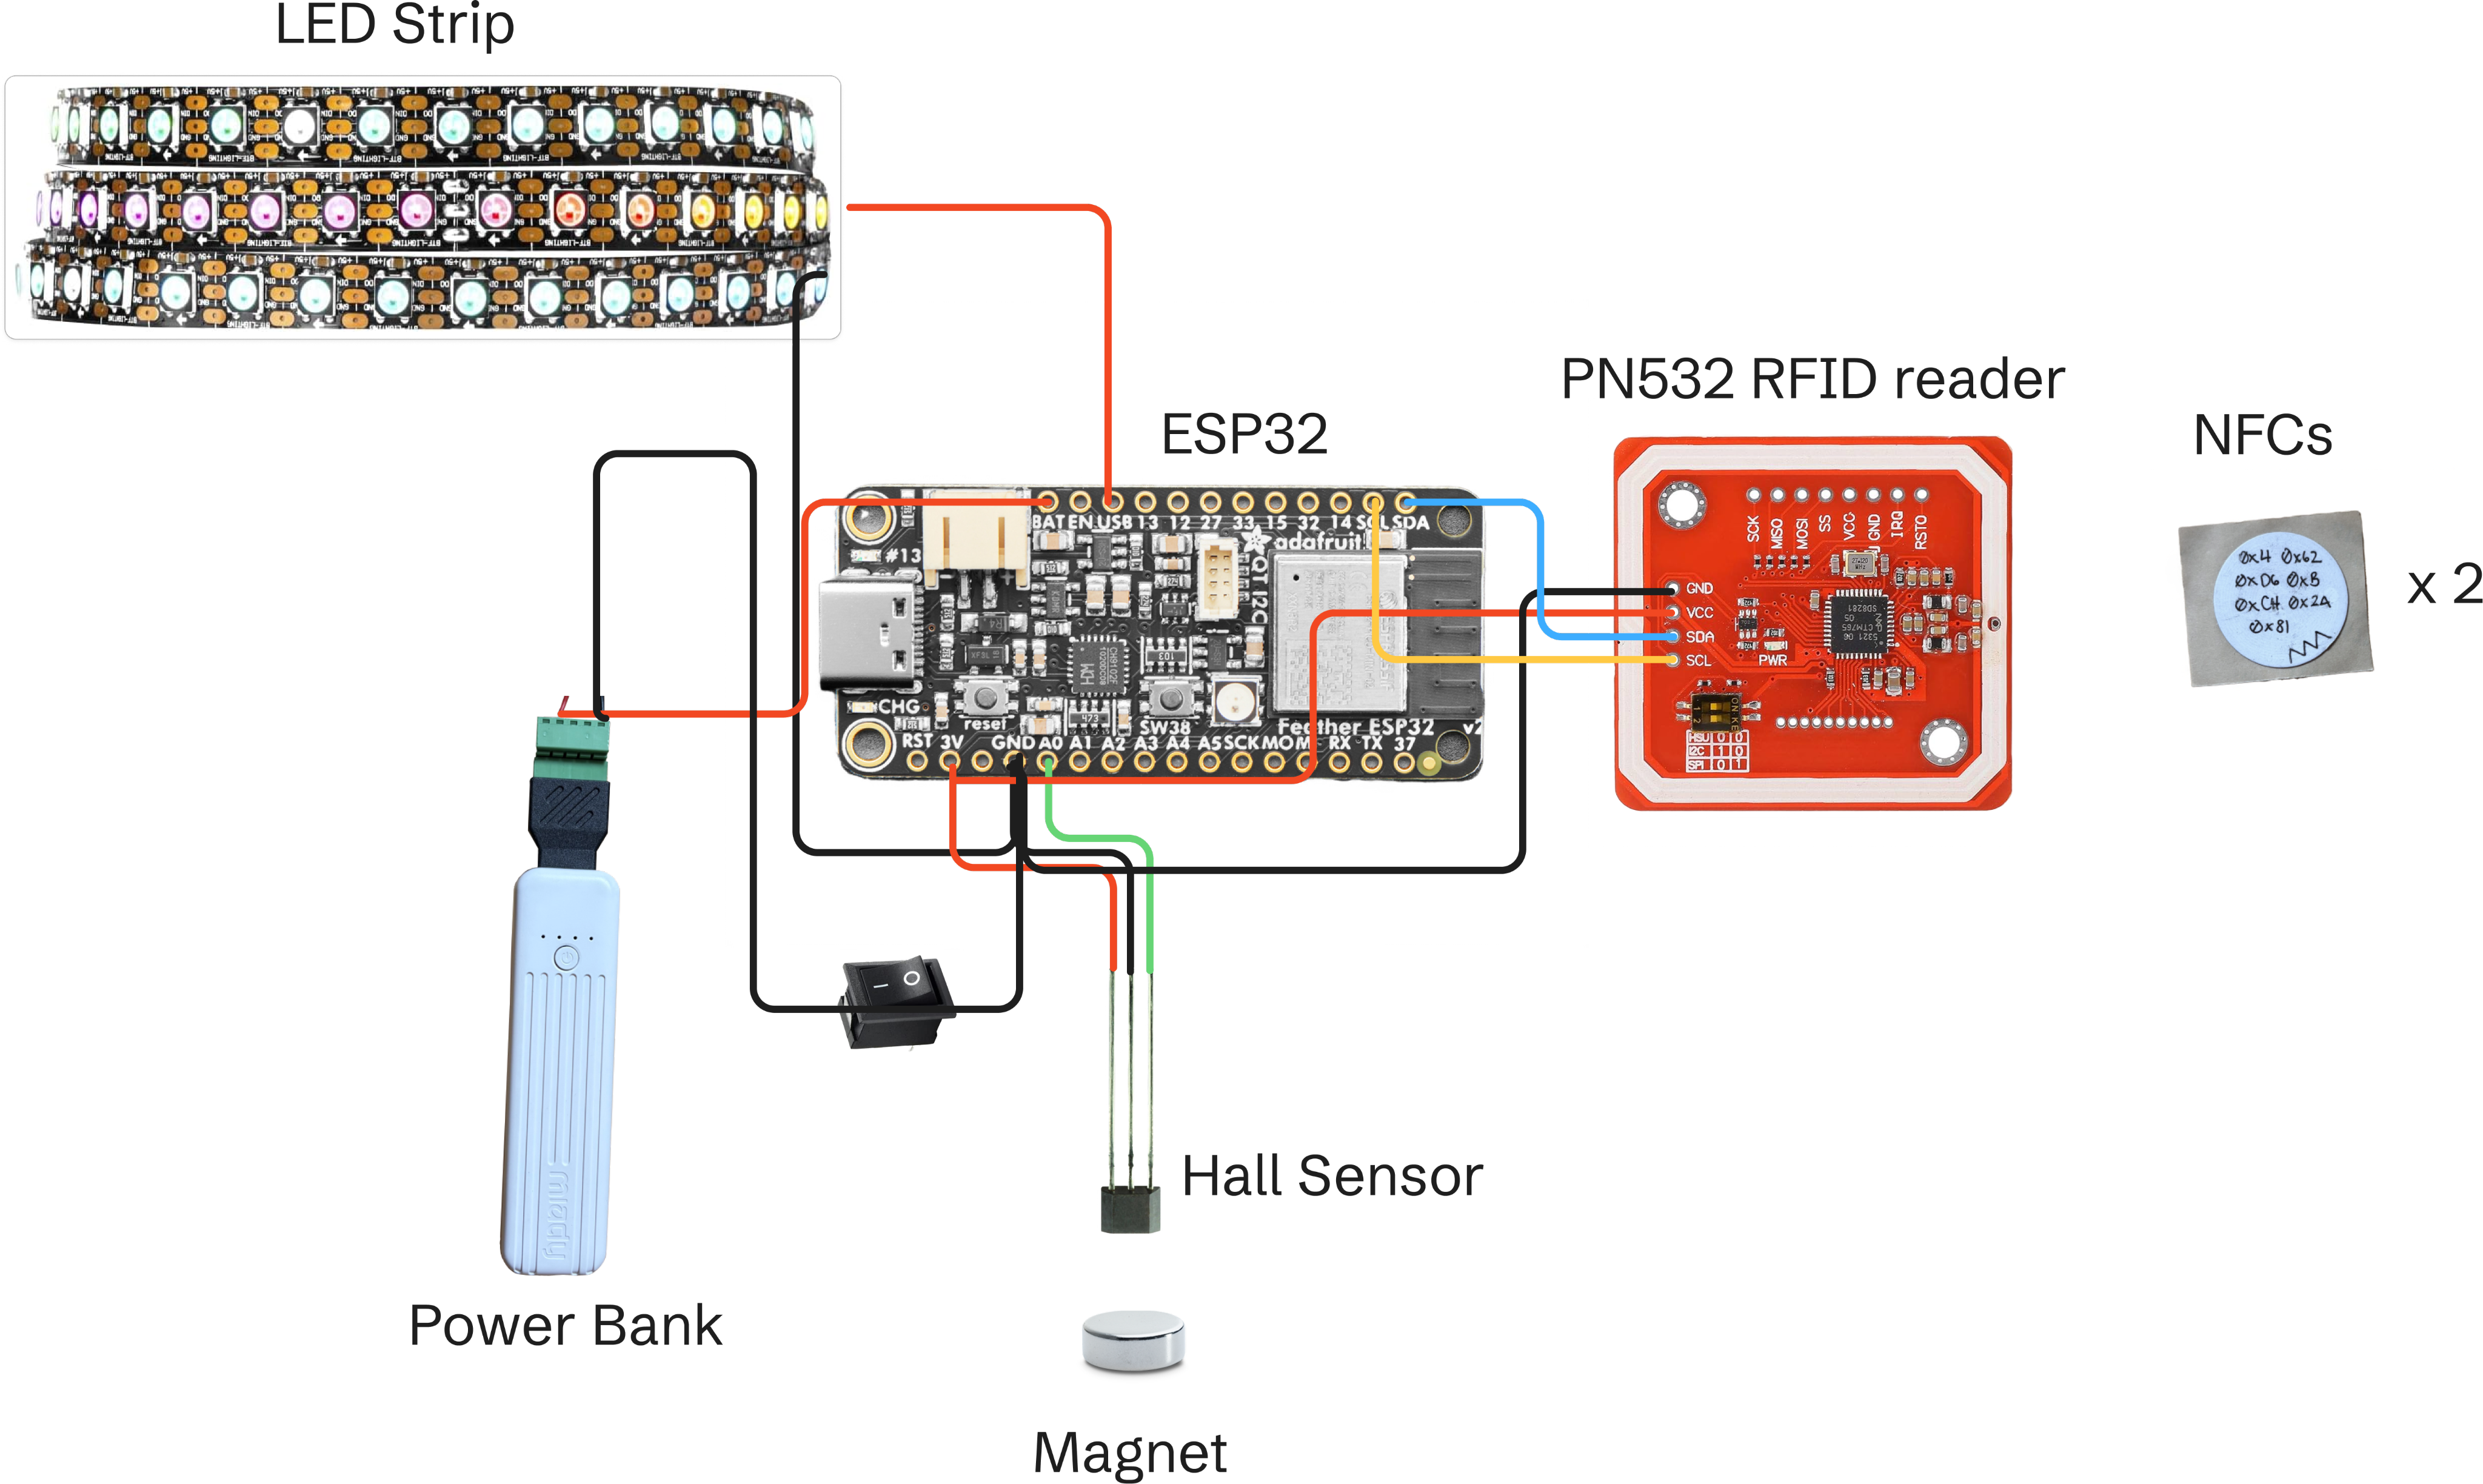
Wiring diagram
I engaged with a range of materials and fabrication methods to bring Light Mode to life, weaving together
Metal
Plastic
3D Printing
Wood
CNC Milling
Laser Cutting
Fabrication
I CNC-milled the wood stand out of an 8/4 plank of poplar, which I jointed in the wood shop prior to milling.
I laser-cut the metal stand out of 1/4” sheet aluminum.
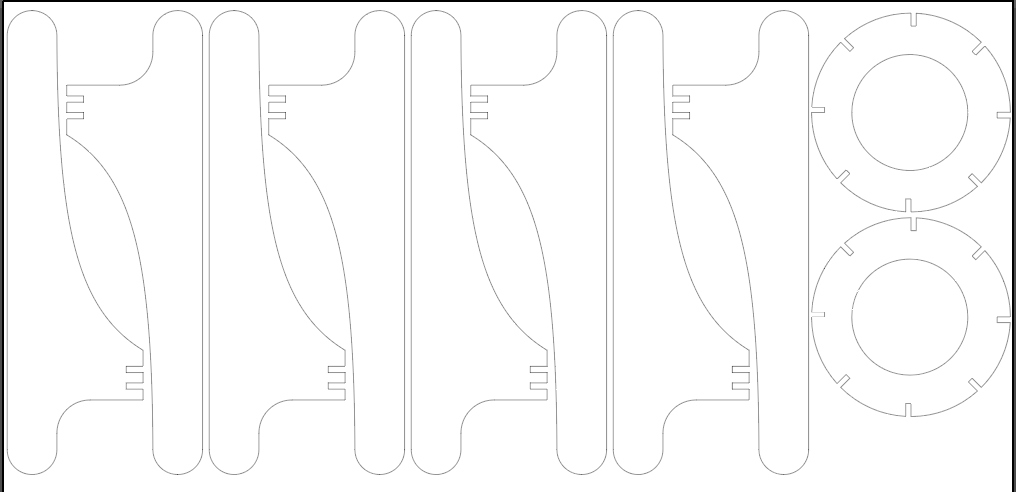
The plastic stand as well as the hardware enclosure and lamp shade were modelled in Fusion360 and 3D printed.
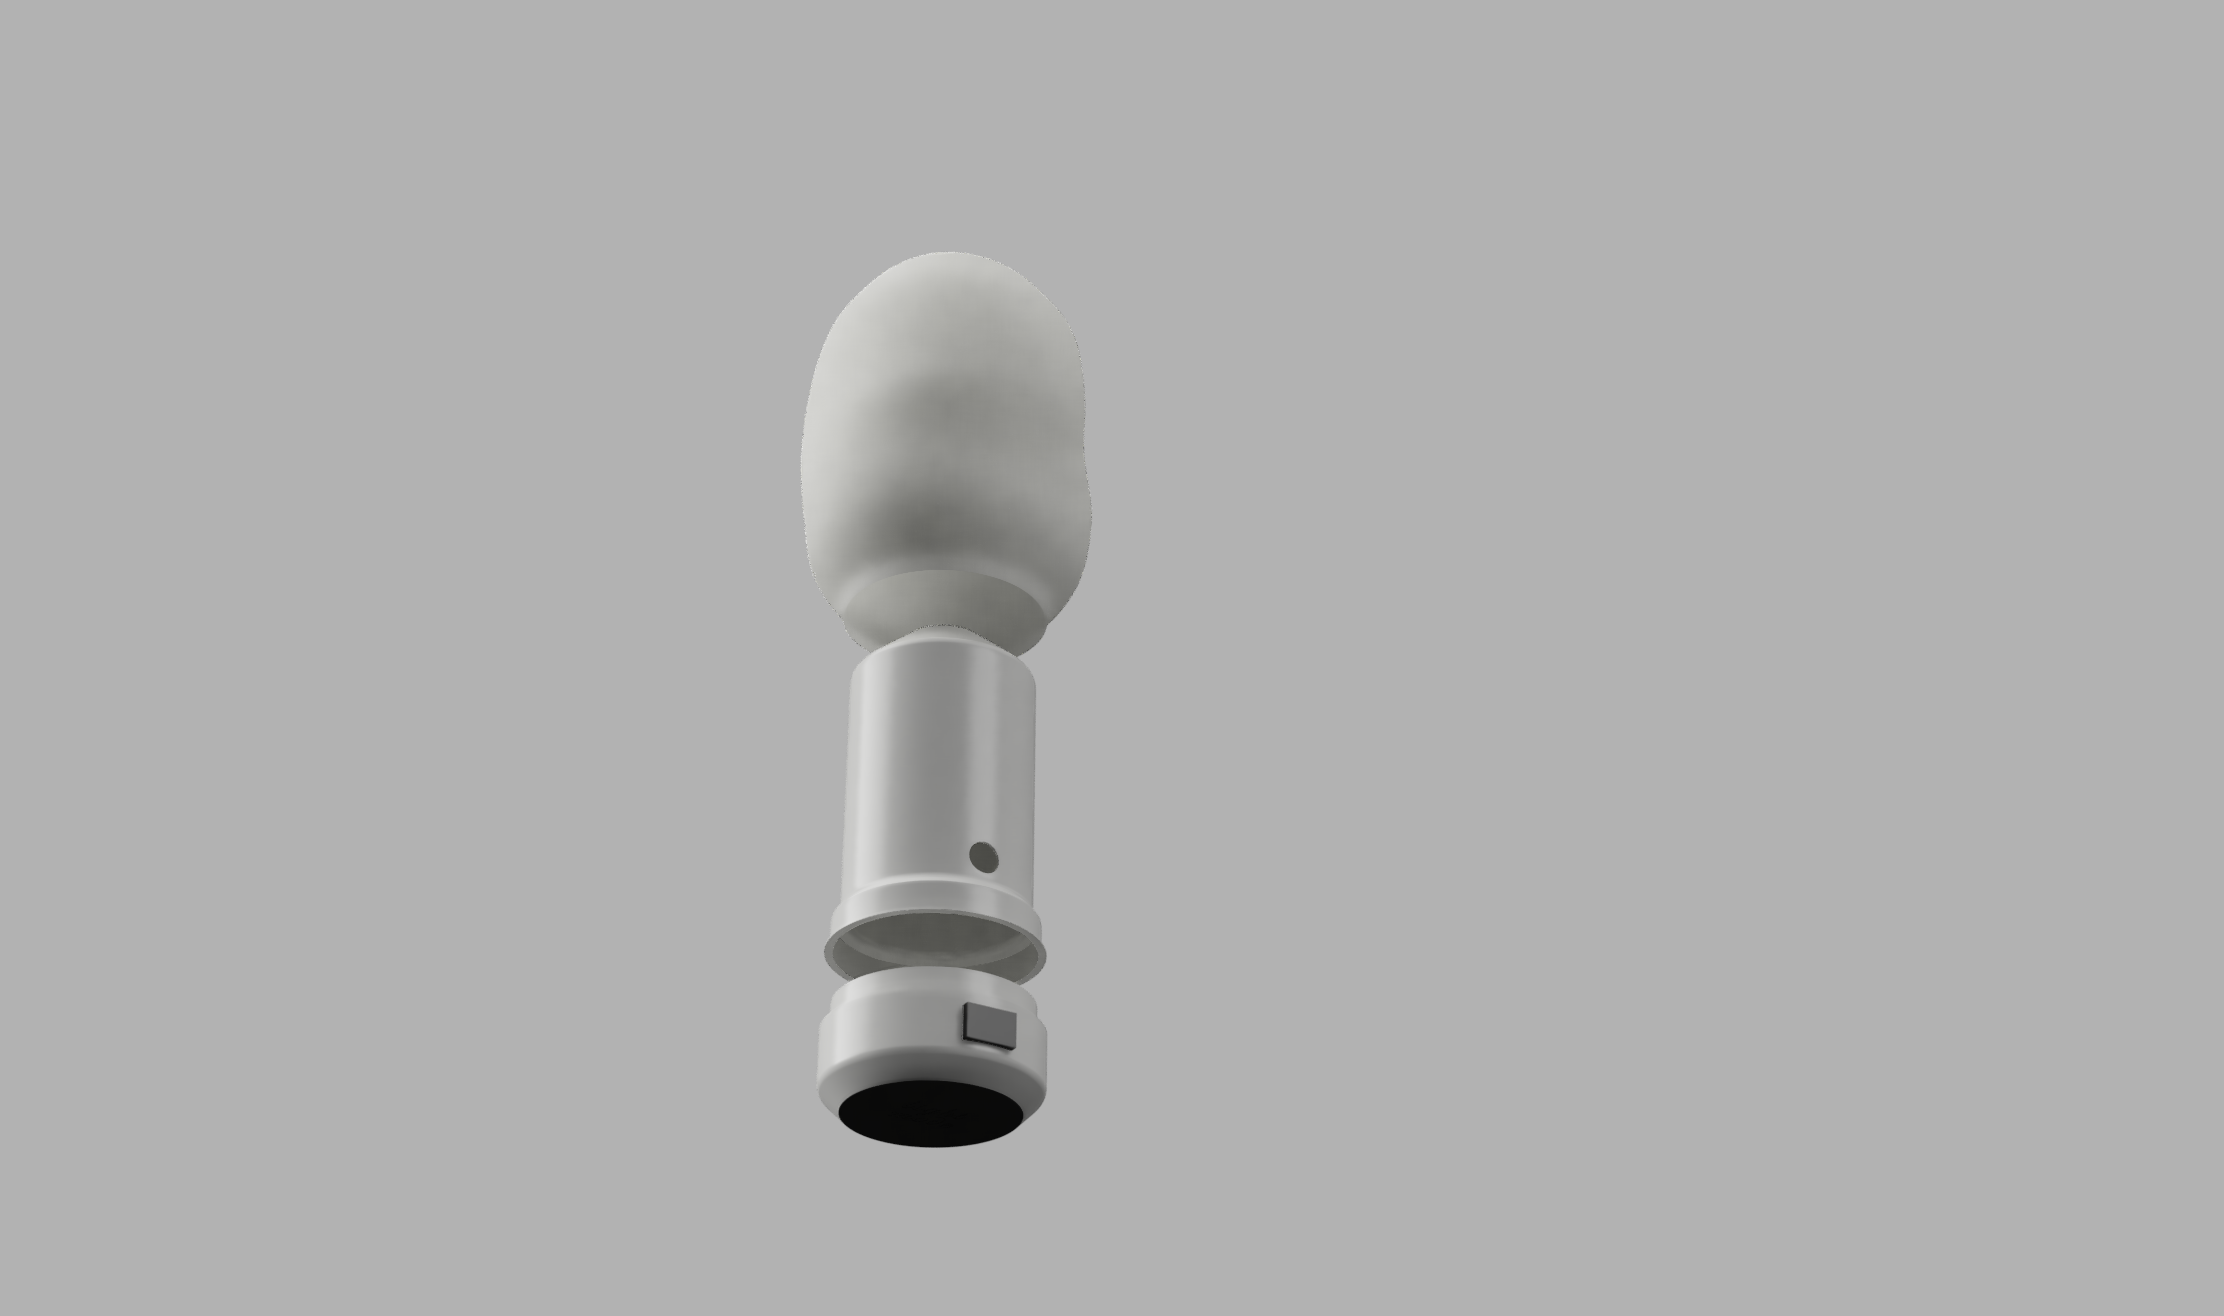
I initially used a screw-on mechanism for the enclosure to allow easy access to the components. However, this complicated cable-management, so I transitioned to a simple press-on fit.
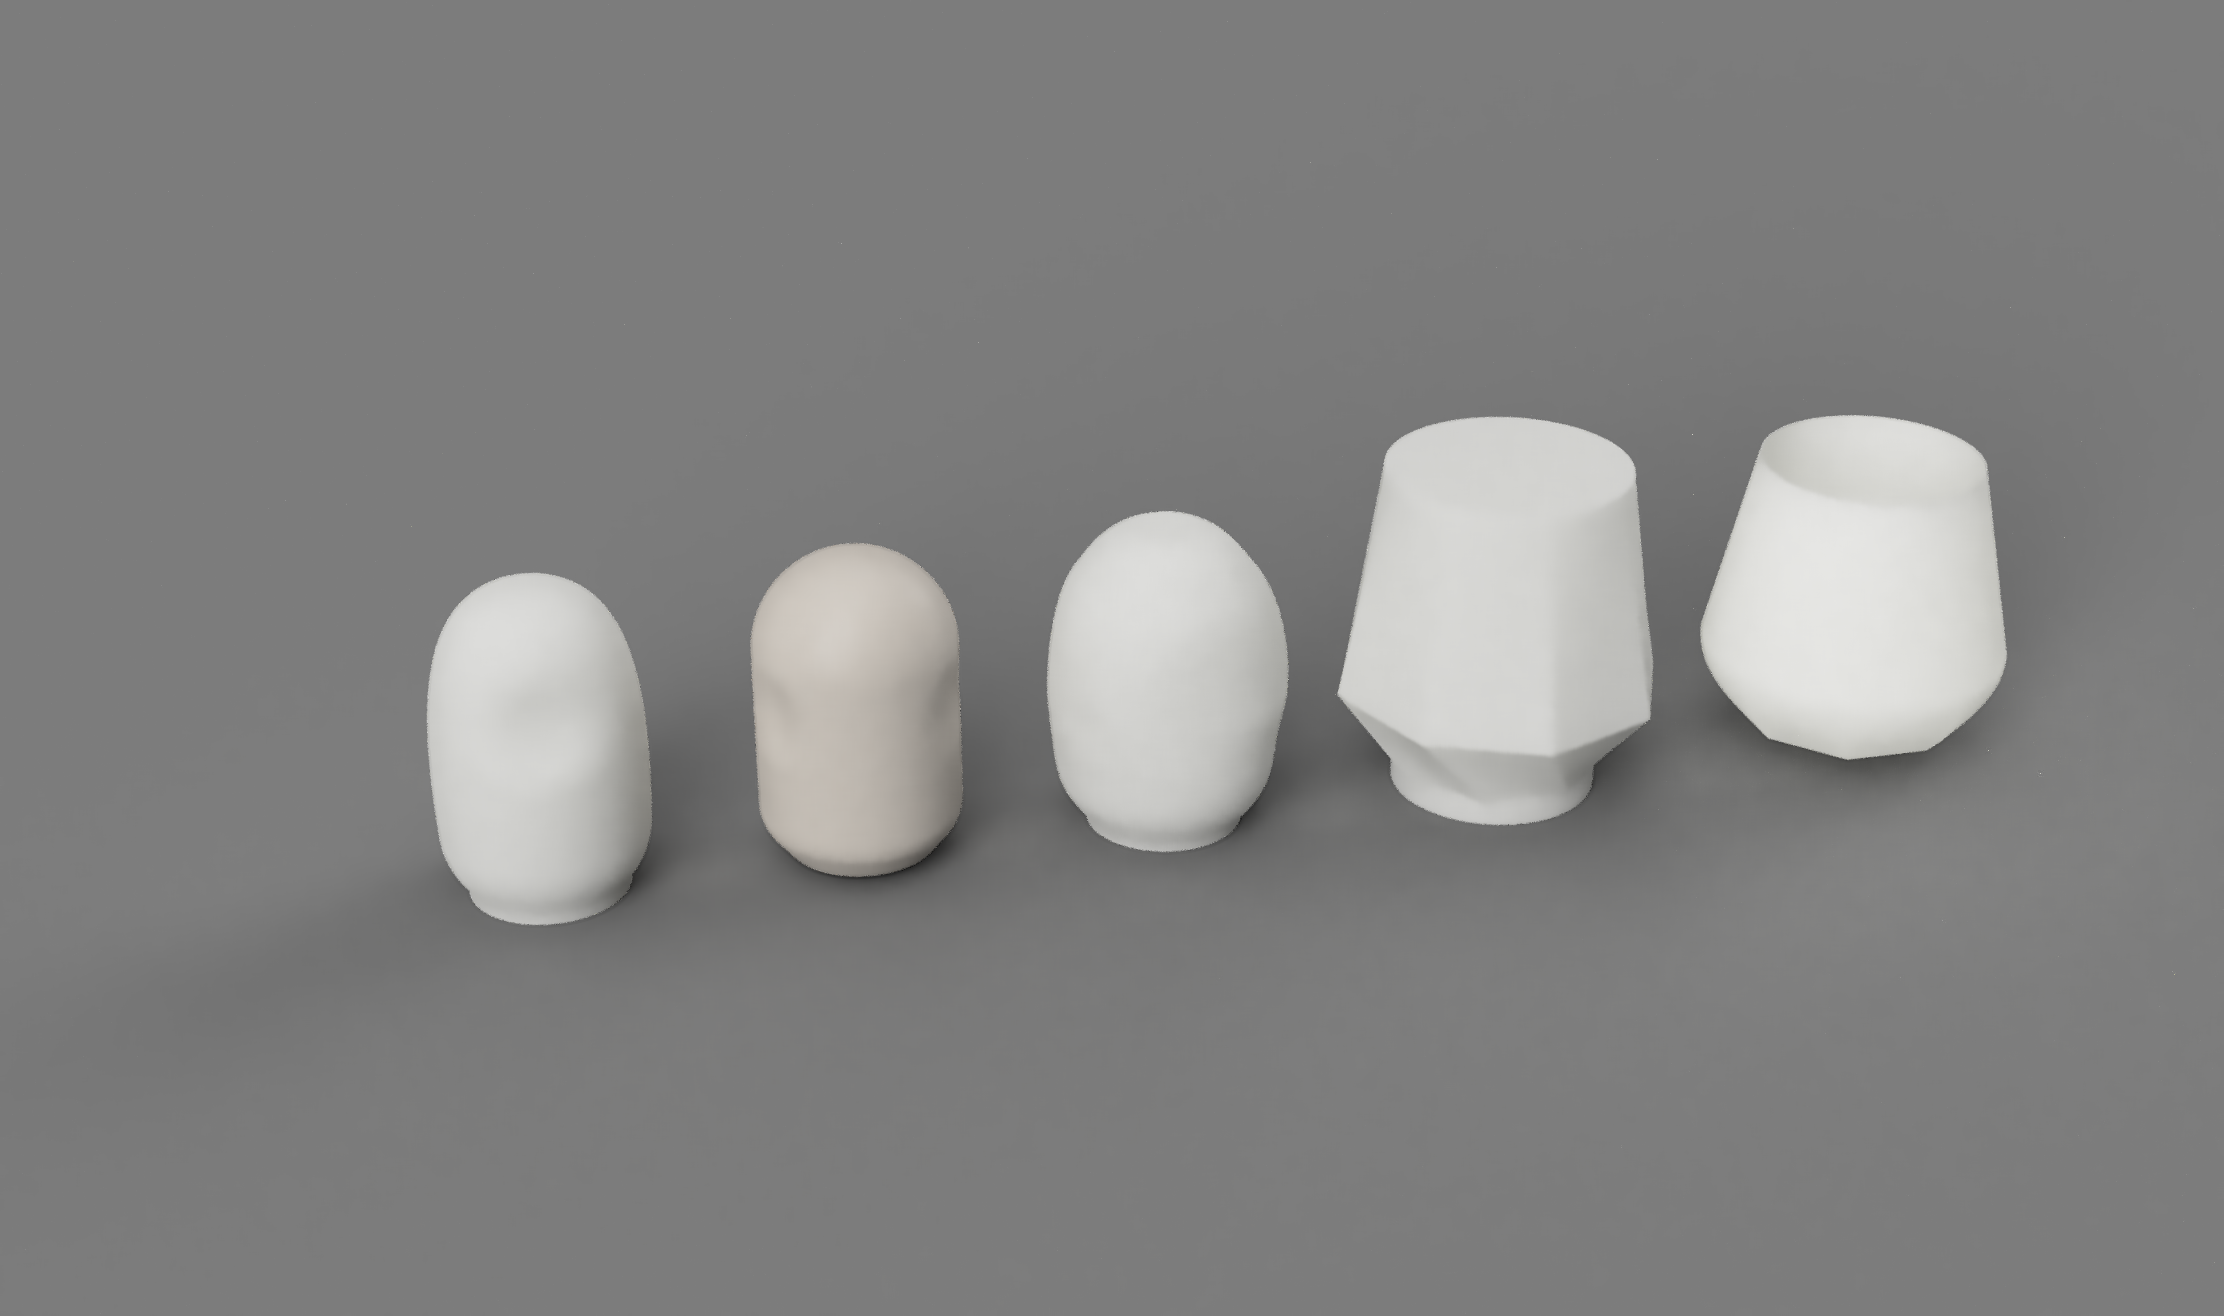
Diffuser shade explorations. I wanted to offer an affordance that invites users to pick up and hold the light.
Hardware
I started by testing different ways to detect which stand was placed on the base and settled on a combination of Hall-effect sensors and RFID after some trial and error. A lot of the early work was messy prototyping: breadboards, inconsistent readings, chasing down noise issues, and figuring out sensor placement that actually worked inside the physical constraints of the object.
I wrote the firmware to read the sensors, interpret the inputs, and trigger specific LED behaviors. Most of the coding work was around making the system stable: filtering noisy readings, setting thresholds, handling edge cases, and making sure the lights responded quickly but not erratically. I iterated on the logic several times as the physical design evolved.
The final system reliably translates physical configurations into different lighting states. It looks simple on the surface, but under the hood it’s an embedded system I designed, wired, and programmed from scratch.
Next steps
What could be improved?
Refining the form factor:
- A small slider switch rather than the rocker switch currently being used would allow the pod to better fit into the stand.
- Refining the 3D printed lampshade to remove the hole in the top; vase mode doesn’t allow for supports
- Allowing the user to carry it to the bathroom as a nightlight (i.e. lighting up when removed from a stand)
Reflections
What did I learn?
Hardware is hard. Unit test and debug systematically:
During final integration, the entire system began acting erratically before going completely unresponsive. To figure out what went wrong, I isolated and tested each subsystem individually. Eventually, I found that the RFID board was fried, likely when I switched the power source from a power bank to AA batteries. I switched back to the power bank, because it provides regulated voltage output.
Fabrication is logistically complicated:
Working with so many materials and mediums was an involved, multi-stage process. For example, before I could CNC mill the wood, I had to joint/plane it first. This is a stark contrast to 3D-printing, which is a much faster and simpler process.